Manage Donations
Add Donation:
Click on Donations from the left hand side panel or ‘Add Donation’ Button on the Dashboard.
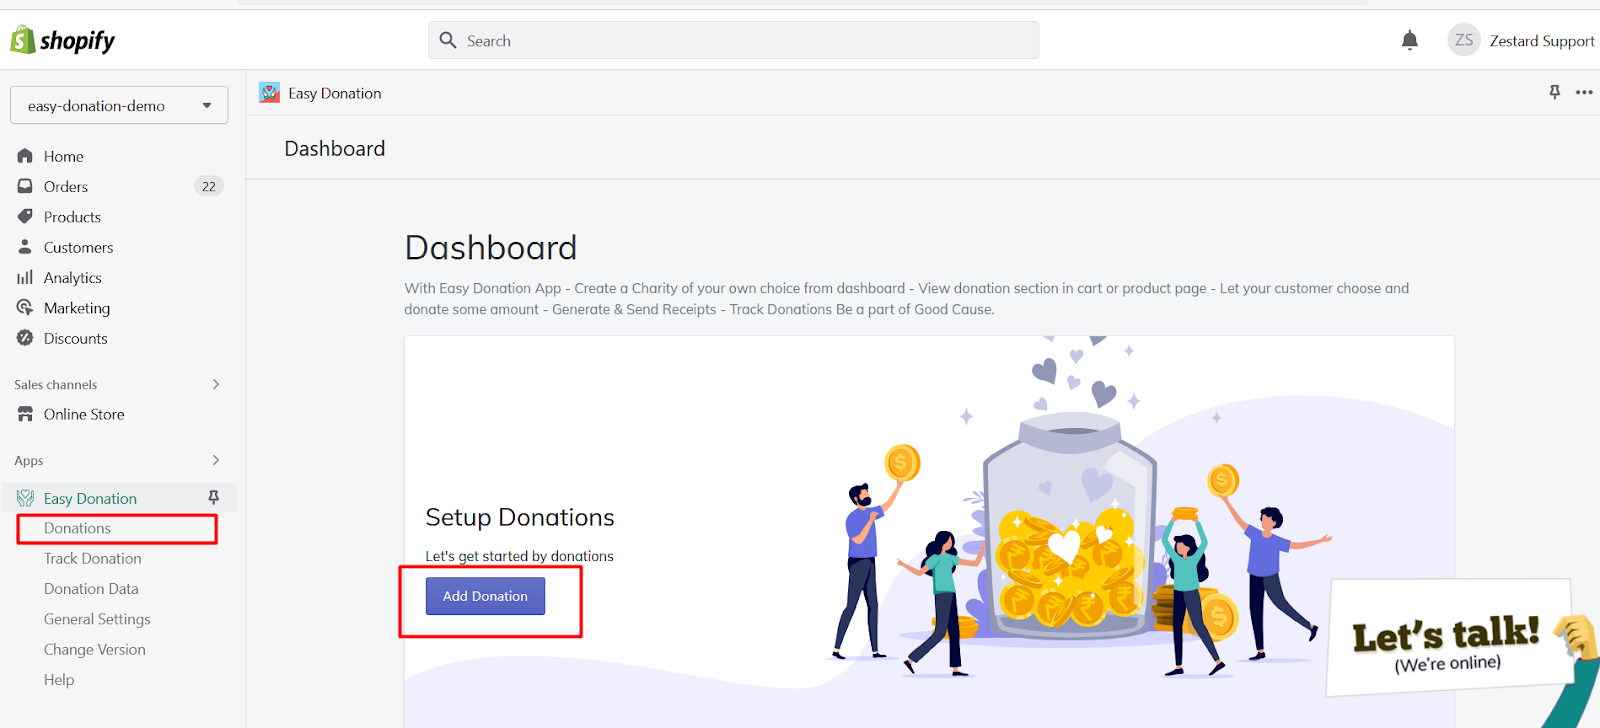
Add the details for Donation (Charity Organization) you would like users to donate to.


Once you have added the details Click on the Add Donation button.
If you are using the Advance Version of the app you will be able to see the List of the Donations here (Donations Tab).
If you are using the Advance Version of the app you will be able to see the List of the Donations here (Donations Tab).

You can Enable / Disable a particular Donation by clicking on Edit > Enable Donation? and save the changes.
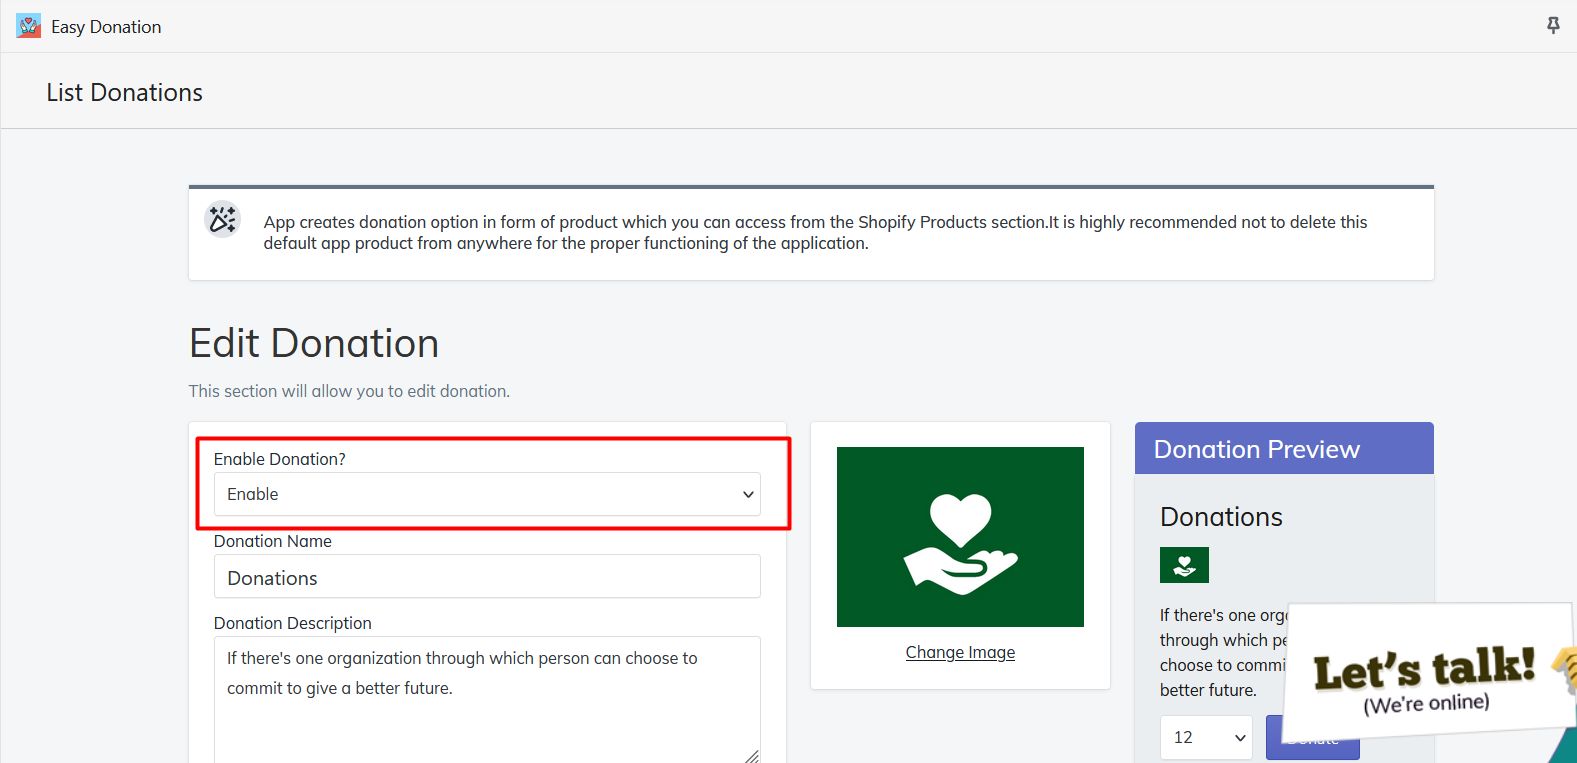
Donation Options:
There are multiple options you will see inside the Admin panel while adding / updating donations (Charity Options).
Tabs
Tabs give a compact & standard look to the widget, you can see how it looks in the preview section.
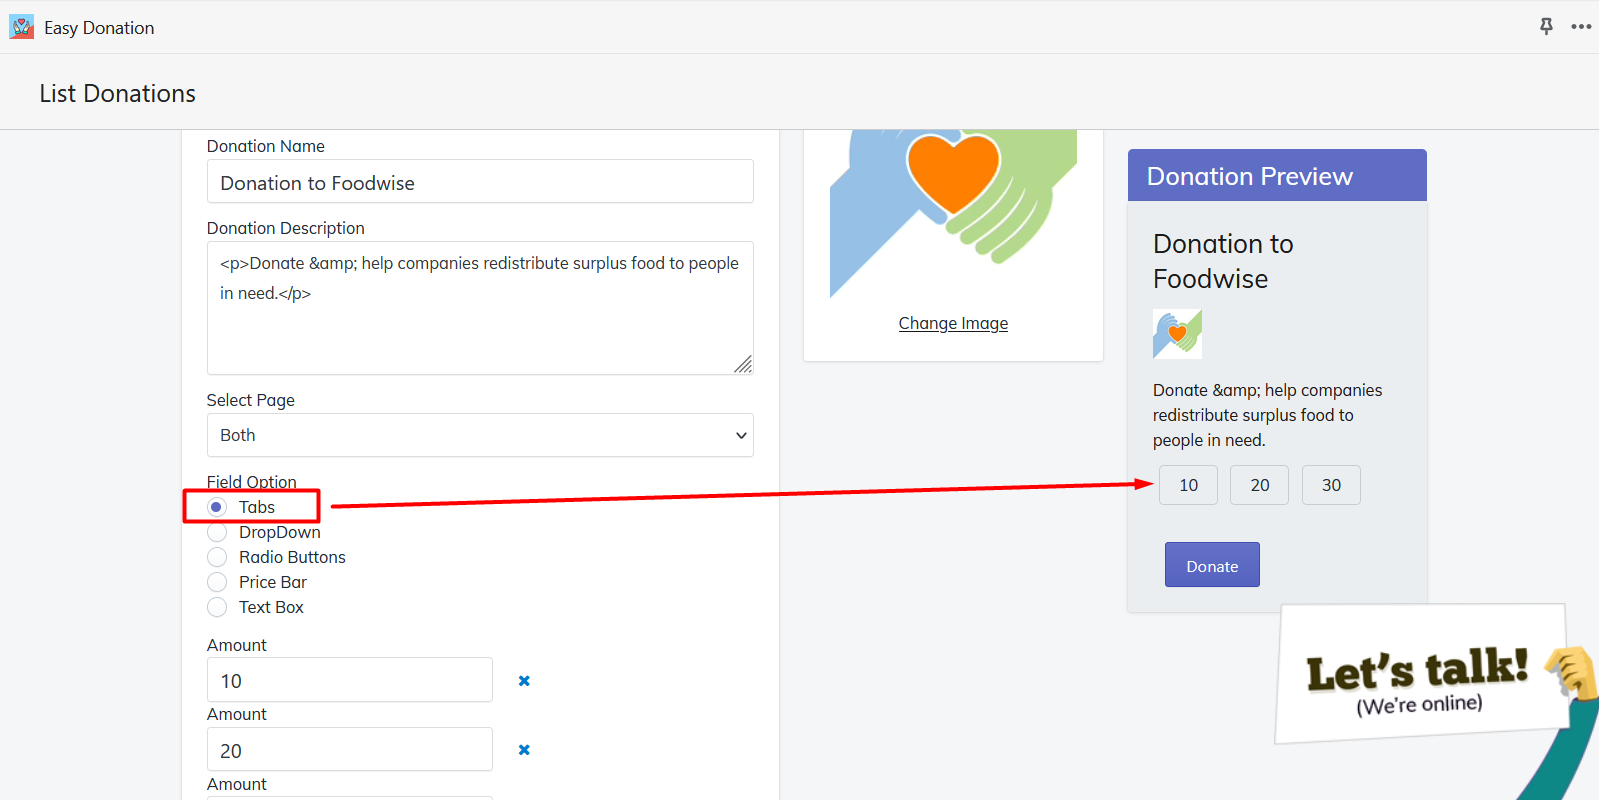
You can add as many as amount options you would like and along with that enable the Custom Amount option which will allow users to donate their chosen amount.
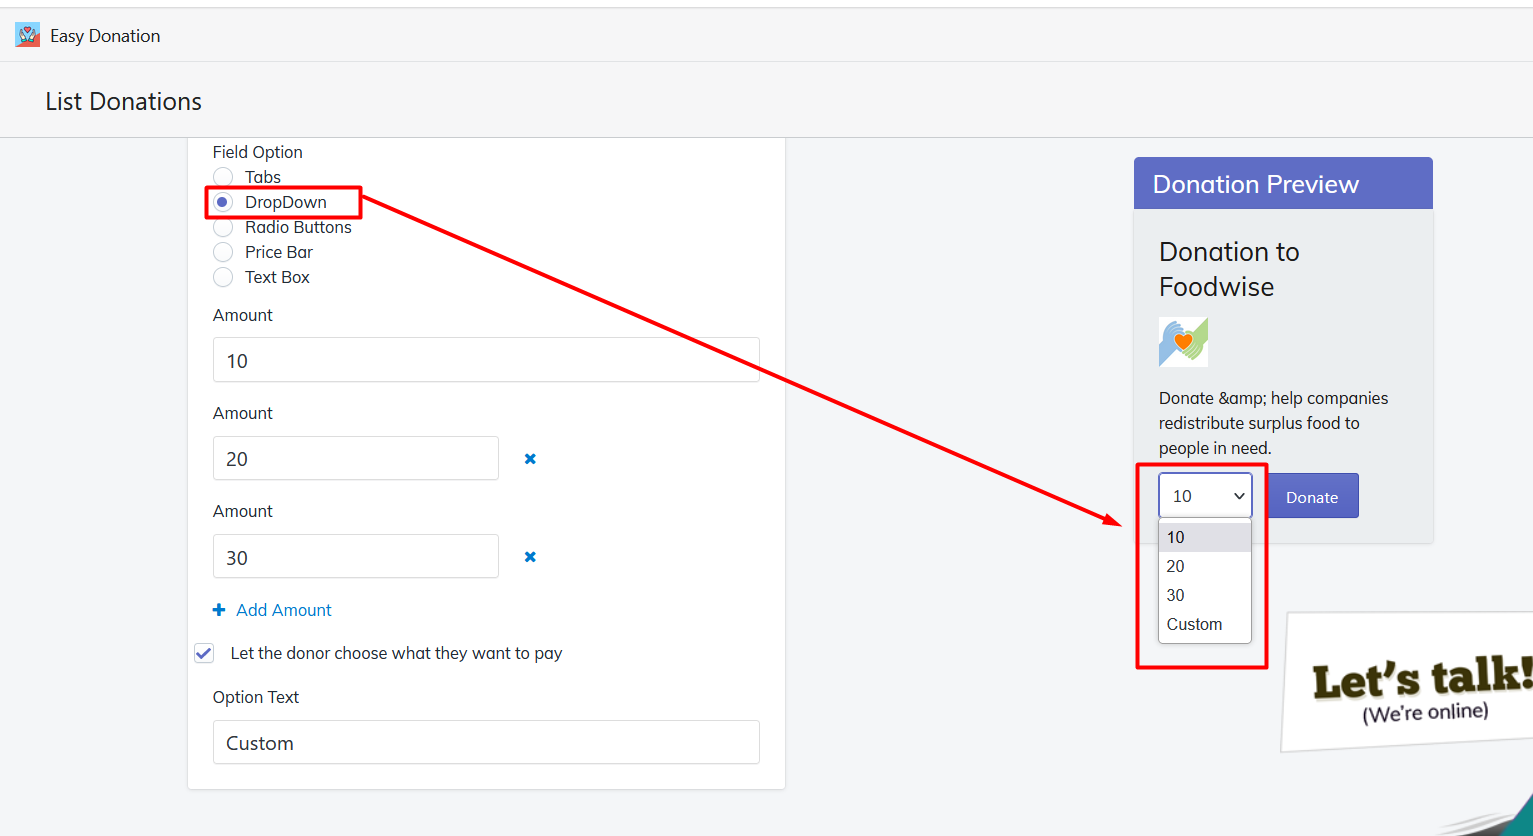
Dropdown
Dropdown option also allows you to add as many as predefined amount options you would like along with the Custom Amount Option.
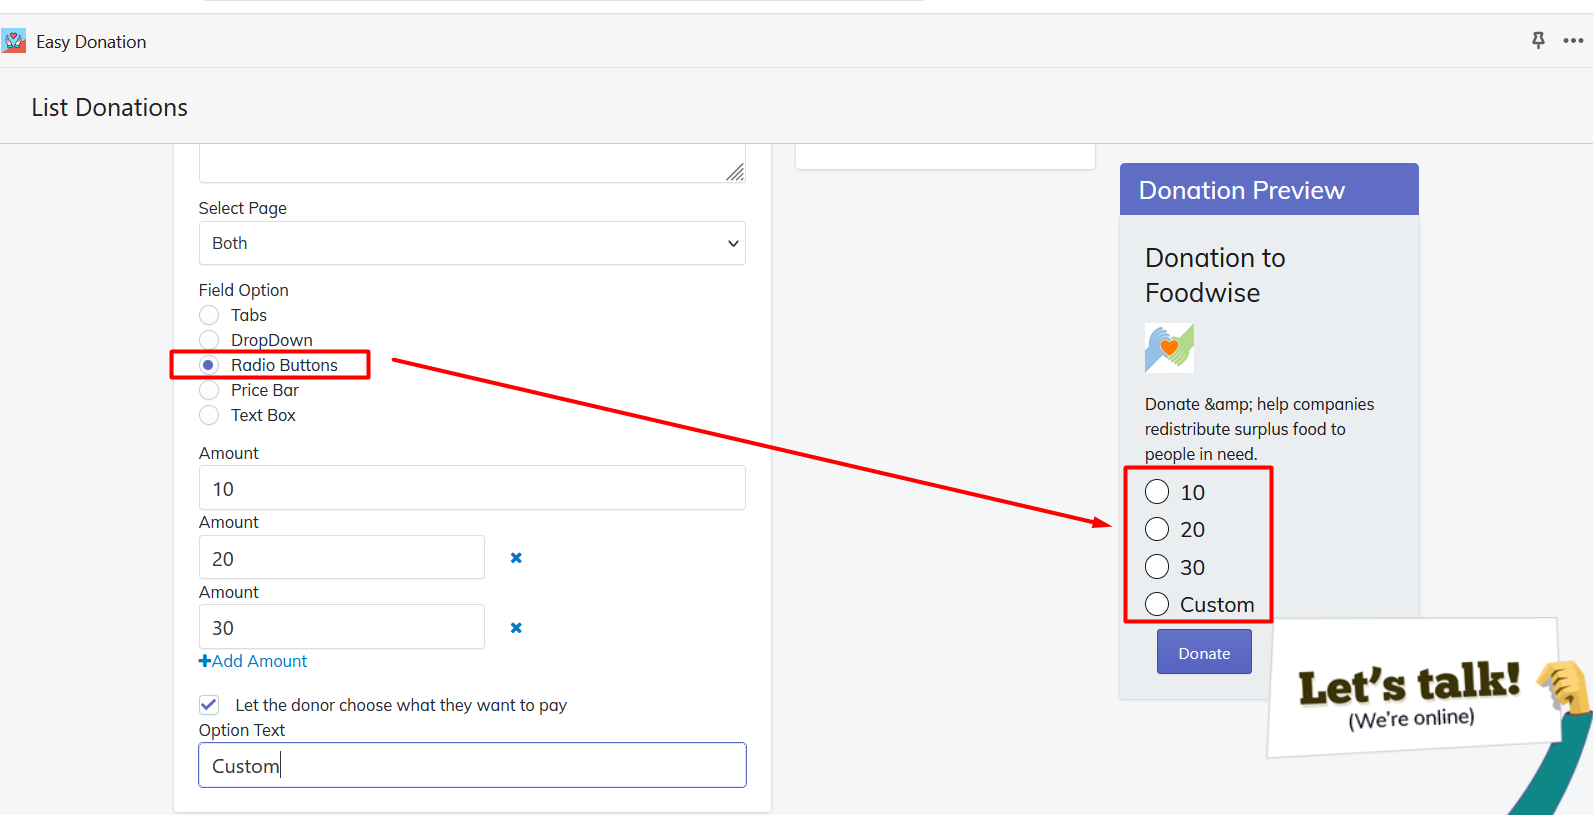
Radio Buttons
Add as many as amount options and enable custom amount option.
You can always look at the representation in the preview section at the right.
You can always look at the representation in the preview section at the right.
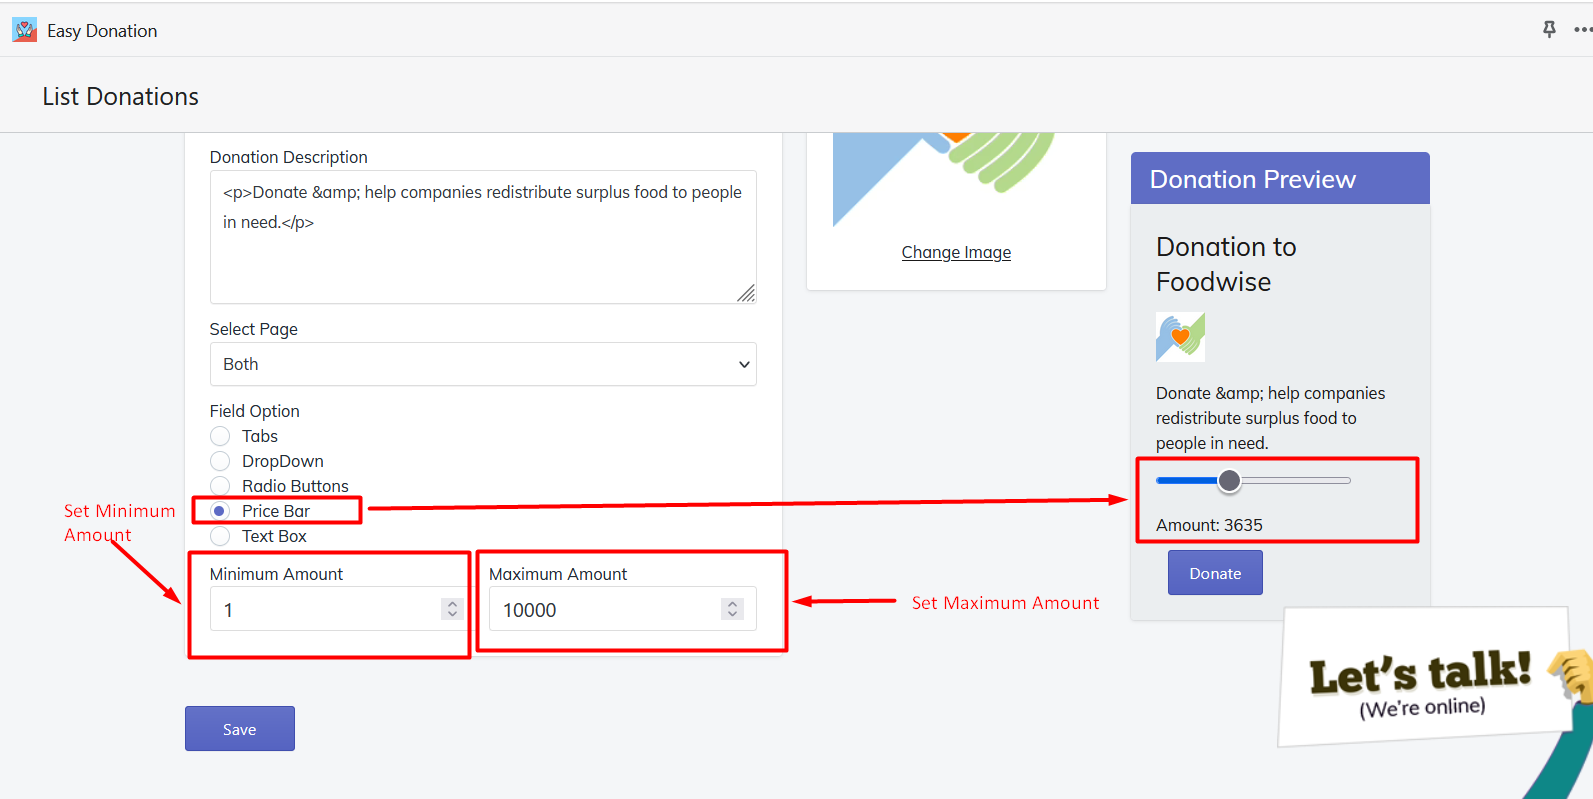
Price Bar
Price Bar allows you to represent the widget with the Progress Bar kind of a look in which you can set Minimum Amount and Maximum Amount.
Text Box
Text Box will allow you to set a Minimum Amount, so that users can add the amount which should be more than that only.

NOTE
The app will add a Donation Product to your Shopify Admin the moment you have added the Donation from the App Back end. Its mandatory to keep it Active on the Online Store Sales Channel for the app to function properly.